Casserole-Style Burritos: Everything.

The primary components of these burritos are: chicken and onions, Spanish rice, cheese, tortillas (using yesterday’s recipe and method), spicy sauce, and cheese sauce (covered in another post).

Burrito Filling (adapted from Don Miguel’s “Black Bean Chicken Burrito Recipe“)
1 T oil
1 small onion, diced
1 clove garlic, crushed and minced
10 oz pulled chicken in bite-sized pieces
1 C diced tomato or canned tomato
salt and pepper to taste
1 C jack cheese, shredded

1.    Lightly saute the onion in the oil until it is translucent and add the garlic. Cook for 1-2 minutes. 
2.    Add the chicken and cook until heated through.
3.    Add the tomatoes and season, then heat through again.
4.    Use the chicken and cheese when assembling the burritos.

Spanish Rice (my personal recipe)
2 C white rice
1/2 diced sweet onion
2 T olive oil
1-2 t each dried oregano, dried basil, chili powder, paprika, cumin, optional red pepper flakes
1/2 C canned crushed tomatoes
2 C water

1.    Place the oil and spices in a deep saucepan or rice pot.
2.    Saute the onions in the oil and spices.
3.    Place one cup of rice in the water and add the other cup to the pot.
4.    After the rice has been heated through in the oil, add the rice, water, and tomatoes. Cook until most, but not all, of the water has boiled off, then cover and simmer over very low heat for 10-15 minutes.
5.    Use when assembling the burritos.

Note: this is a lot of rice and you will probably have some left over.

Spicy Sauce (adapted from Cooks.Com “BAKED BURRITOS WITH SPICY SAUCE“)
1 onion, diced
2 cloves garlic, crushed and minced
1/2 C water
1/3 C canned green chilies
2 T chili powder
1 t cumin
1/2 t cayenne pepper
1 (8 oz.) can tomato sauce
1 (6 oz.) can tomato paste
2 C water

1.    Cook the onion and garlic in the 1/2 C water for about 5 minutes and add the spices.
2.    Add the chilies, tomato, and water, then simmer for about 15 minutes.
3.    Use when assembling the burritos and over top of the burritos before baking.

Final Casserole Assembly
Chicken filling and cheese
Spanish rice
Spicy and/or cheese sauce
8+ tortillas, depending on size

1.    Oil one or two pans big enough to hold all the burritos. You will want separate pans for each sauce.
2.    Place a tortilla on a large plate, then fill with chicken, cheese, rice, and a little sauce.
3.    Roll the burrito and place in a pan, then repeat for all the burritos.


4.    Top the burritos with their respective sauces, adding more cheese to the top, if desired.


5.    Bake the casserole(s) until they are heated through, then serve.

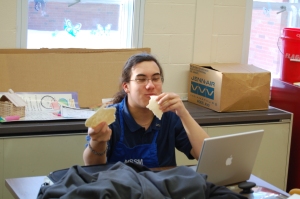
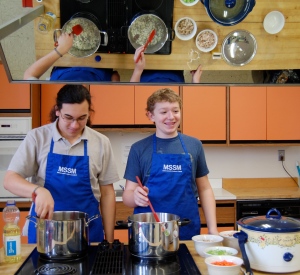
After getting fresh basil from the cafeteria because everything in the greenhouse had been picked, we ran into our first major problem. Since our knife choices were butter, steak, and 10-inch chef’s, cutting the bone out of chicken thighs was very difficult. So, rather than continuing to fight the raw chicken, Alex suggested that we bake the chicken. Baking the chicken reminded me that making the burrito filling works very well with any leftover cooked chicken; you don’t need to cook your chicken specifically for this meal.

For our sauces, we used canned tomato sauce and canned diced tomatoes. I blended the diced tomatoes a little to remove the large lumps of tomatoes and we used them in just about everything. To avoid opening more cans, I improvised some on the spicy sauce. I’m not sure how the sauce would turn out if I used the exact ingredients specified, but I think it would be good. I think both casseroles would have turned out better if they had both had the correct amount of sauce and spare space in the pan. While there was a good amount of cheese sauce, there was too much space in the pan and the spicy casserole was lacking both sauce and space.

Cheesy Sauce

Spicy Sauce

Personally, I prefer plain wrapped burritos to a casserole, but there are reasons to make one instead of the other. In significant support of the casserole is the awkward shapes of the tortillas. Since we weren’t cutting the dough after rolling it, no two tortillas were the same size or shape. Since the burrito only needs to hold together long enough to be put in the pan for a casserole, the tortilla only has to be strong, not carefully shaped. However, the casserole took a long time to bake in comparison to assembling burritos from hot ingredients and serving immediately.

Overall, both burrito casseroles were successful. Everyone in our class and other classes who came in to eat some of the burritos appeared to like them. However, in addition to getting the amount of sauce correct, Alex thought the burritos could use more chicken and I thought the burritos could use more rice. When we make more burritos, we can see how we want to do the filling ratios.

Creative Commons License

Strawberry Cream Cake

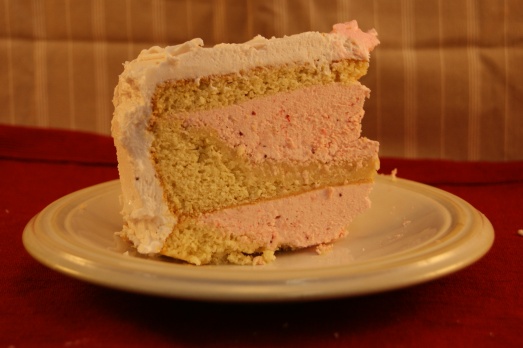
This delicious  cake is certainly the most complicated recipe we will be attempting. It’s a very touchy recipe, with a number of very specific steps that affect the outcome of the cake. We did make a few alterations to this cake. The icing was originally white chocolate, but we decided that it wasn’t cost effective, so a light whipped icing was substituted. Raspberries were originally called for in the filling, but we switched to strawberries because there were some left over from the cheesecake.
Ingredients:
  • 2 ¾ c Butter
  • 2 ½ c + 1T Granulated Sugar
  • ¼ c Water
  • 9 ½ egg whites
  • ½ + ⅛ t Cream of Tartar
  • 3 oz Fresh Orange Juice
  • ¾ c frozen strawberries, defrosted
  • 2 c Vegetable Shortening
  • 8 c Confectioners Sugar
  • 1 ¼ t Salt
  • 4 ½ t Vanilla
  • ¾ c Heavy Whipping Cream
  • 1 c Milk
  • 3 c cake flour
  • 4 t Baking powder

Cake:
1. Preheat the oven to 350°F.
2. Combine 4½ egg whites, ¼c milk, and 2¼t vanilla.
3. In a mixing bowl, combine cake flour, 1½c  Sugar, baking powder, and ¾t salt.
4. Add to the dry ingredients ¾c butter and ¾c milk. Slowly mix until moist.
5. Beat at medium speed for 1½ minutes to aerate batter.
6. Add ⅓ of the egg batter. Beat for 20 seconds. Repeat with remaining batter.
7. Pour into two greased and flowered pans.
8. Bake for 25-30 minutes. Then, cool on metal racks for ~10 minutes.

Filling:
1. Beat butter until smooth and creamy with a wooden spoon.
2. Puree frozen strawberries with 1 T sugar. Drain off liquid; make sure to retain a few tablespoons to use as coloring.
3. Pour strawberry puree into the butter and mix well.
4. In a small saucepan heat ¾ c sugar and ¼ c water until sugar dissolves and the mix bubbles. Remove from heat.
5. Beat 5 egg whites and cream of tartar until there are soft peaks.
6. Beat into the eggs ¼ c Sugar until stiff peaks.
7. Bring the syrup in the saucepan up to 248°. Transfer syrup to glass container to stop cooking.
8. Beat the syrup into the whites. Continue beating until cool.
9. Beat in 2 c butter at a medium speed.
10. At a slow speed, add orange juice
11. Refrigerate until used. Quickly beat directly before constructing cakeIcing:
1. Cream shortening until fluffy. Pour in confectioners sugar and blend well.
2. Add  2 t vanilla, ½ t salt, and whipping cream. Blend until moist.
3. Beat at high speed until fluffy.
4. Slowly beat in retained strawberry juice until icing is a pleasant shade of pink

Construction:
1. split the layers of the cake in half horizontally
2. spread one layer with a portion of the filling. Then, cement another layer on top.
3. repeat for all layers
4. chill the cake for 10 minutes
5. spread frosting over cake

There were a number of complications associated with this cake,  but it came out well. For some reason one of the cakes fell in the middle and the other did not. The only explanation we could find was that the batter was unevenly mixed, causing one of the pans to have less fat in it. Either way, we couldn’t properly divide the sunken one, so we only divided one of the layers in half. We placed the half layers on the top and bottom, with the messed up layer in the middle.
Icing the cake was relatively simple, and it came out well. The only recommendation would be to add about 1/4c of strawberry juice, rather than 1-2 T, as the color did not show up well. We would also add more strawberry puree to the filling, because the butter overwhelms the taste somewhat.

Ravioli: Take Two

Yesterday, we quickly mentioned the pumpkin ravioli. This ravioli is similar to the four cheese in that the dough is the same, but other than that, they are very different. The filling has pumpkin puree, which is the insides of a pumpkin minus the seeds baked at 350˚ with the shell, and then pureed. It also has nutmeg, ricotta, and salt. We made this mixture and left it in the fridge overnight.

Today we are assembling both the four cheese and the pumpkin ravioli, and so far things are turning out as expected! We have already learned the thinner the dough the better. While boiling you will be able to tell if the dough is too thick because the dough will start to separate from itself and form air pockets. Luckily, we learned this from our first trial and we were able to make the pumpkin ravioli a bit thinner, but it was still slightly too thick. The filling was still delicious.

Ravioli Dough

2 c all-purpose flour
1 pinch salt
1 t olive oil
2 eggs
1 1/2 T water

  1. Mix the flour and salt together in a bowl and form a well. Beat the olive oil, eggs, and water in a bowl. Pour half the egg mixture into the well. Begin mixing the egg with the flour with one hand; use your other hand to keep the flour mound steady. Add the remaining egg mixture and knead to form a dough.
  2. Knead the dough until smooth, this will take about 8 to 10 minutes, and add more flour if the dough is too sticky. Form the dough into a ball and wrap tightly with plastic., then refrigerate for 1 hour.
  3. After chilled, flatten dough with a rolling pin and make into a large rectangle

Pumpkin Ravioli Filling 

Ingredients

1 c ricotta cheese
1/2 c pumpkin puree
1/2 t salt
1/4 t ground nutmeg

Directions

  1. Mix the cheese, pumpkin, 1/2 teaspoon salt, and the nutmeg. Set filling aside.
  2. Drop 2 level teaspoons filling onto half of the rectangle, about 1 1/2 inches apart in 2 rows of 4 mounds each. Moisten the edges of the dough, and the dough between the rows of pumpkin mixture with water. Fold the other half of the dough up over the pumpkin mixture, pressing the dough down around the pumpkin. Cut between the rows of filling to make ravioli; press the edges together with a fork, or cut with a pastry wheel. Seal edges well. Repeat with the remaining dough and pumpkin filling. Place ravioli on towel. Let stand, turning once, until dry, about 30 minutes.
  3. Cook ravioli in 4 quarts of boiling salted water until tender; drain carefully.

For later in the week, we are going to attempt to contact anyone we know to try to find an attachment to the kitchen aid to make the pasta thinner. This would make the pasta making process much easier and would allow us to make thinner pasta, hopefully improving the overall quality of the dish. For tomorrow, we plan to try making uniform-sized squares and lay them on top of one another and crimp all four edges, instead of a slice that we fold. Hopefully allowing a thinner edge and decreasing the amount of dough to filling ratio. Other changes we hope to make are a smaller ravioli to allow for a shorter cooking time. We also plan to make sure the ravioli is served hot to make sure the cheese filling doesn’t harden in the cool air.

Although today the ravioli cooking process went very smoothly and was much easier than we thought, the final product was very unsatisfactory.  I personally found both the taste and texture of the ravioli utterly disgusting. The thickness of the dough upset my stomach and made the ravioli itself difficult to eat. Although the filling of both had an exceptional flavor, the proportions of the ravioli to filling was all wrong. Pasta is my favorite dish, and today was disappointing. For the rest of the week I want to be more cautious about thickness and distribution, hopefully with the mistakes made today this will be possible.

-Jenna

My expectations of the ravioli were not met in today’s attempts. The raviolis came out looking sad and diseased. This appearance was brought on by the discoloration, appearing almost white, and the air bubbles on the surface. The thickness of the dough was also a problem. The dough turned tough, and thick when cooked, even though we rolled it out thinner than a dime. Tomorrow I hope to remedy these problems by making the ravioli differently, rolling the dough thinner, and serving them hot. The assembly will be different in the way that we are cutting two uniform sheets and laying one atop the other with the filling in between. The other two steps seem self explanatory.

-Ryan

I was not expecting the taste and texture of the ravioli at all. We made the pasta as thin as a dime, but the ravioli was still very thick. It made the cook time of the ravioli much longer than usual. , and when I ate just a few, my stomach felt very queasy. The filling was very good and helped drown of the taste of the pasta.  In the pumpkin ravioli, the nutmeg was much stronger than all of the other tastes. I almost couldn’t taste the pumpkin it was so strong.  I think that a pasta maker could help make the pasta thinner, which would lessen my stomach ache. Also, making squares the same size could minimize the amount of extra pasta on the sides of the ravioli.

-Zeb

Looking Towards a Week of Mexican Food (Now with tortillas)

Today, we will be investigating the Mexican tradition of burritos, using homemade tortillas, homemade sauce, and our very own homemade spiced chicken. Our group will focus on this for the entire week. We will be sticking with the same meat, the same tortilla, and the same rice recipes, but changing between sauces to see which fits best. This process begins today. Along with this, we are making authentic Mexican rice, using a family recipe from Thomas.

Tortillas (adapted from Hillbilly Housewife’s “Flour Tortilla“)
4 C flour
1 t salt
2 t baking powder
5 T lard, shortening, butter, or vegetable oil
1 1/2 C water

1.    Mix together the flour, salt, and baking powder, then cut or mix the fat into the flour.
2.    Mix all the water into the flour and fat in stages until the dough comes together.
3.    Split the dough into 8-16 pieces, depending on the size and thickness of tortilla desired. Some experimentation may be necessary.
4.    Lightly flour a counter and roll out the dough. The goal is to make the tortillas as thin as possible without tearing or folding the tortilla.
5.    Cook the tortillas on a hot griddle or pan without any grease. If you can roll the tortillas fast enough, you can cook and roll tortillas simultaneously. If not, you can roll a set of tortillas and layer them between pieces of waxed paper.
6.    For hard tortillas, serve immediately. To make tortillas soft for burritos or soft tacos, place the tortillas in a large sealable plastic bag and leave them there until you are ready to prepare the next dish.

It took quite a few tries to get these tortillas to turn out. Notably, you do not want to use any grease on the cooking surface because the tortillas will cook and not stick. Depending on the desired size of the tortilla, a pan might be large enough, but for burrito wrapper sized tortillas, you will need to use a very large cooking surface. Also, depending on how long the dough sits out, it may be necessary to wet the each ball before rolling it.

Figure out how step six in the above instructions worked was quite an interesting procedure. After some “quick fix” attempts using wet paper towels and a microwave or making slightly wetter dough didn’t work. Since we aren’t planning on serving the tortillas immediately (they will be burrito wrappers), the plastic bag method seems to be the most effective and useful way to soften the tortillas.

Creative Commons License

Chocolate Oblivion Truffle Torte

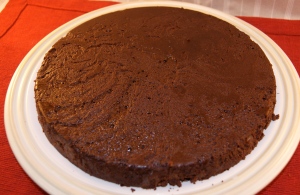
Chocolate Oblivion Truffle Torte in name alone sounds absurdly decadent. This light and fluffy torte is not too complicated, but requires lengthy preparations and will need to be executed carefully. Only calling for three ingredients, the recipe will serve a good number of people and would be great for any special occasion. This torte is also a good substitute for a normal cake and is perfect for the chocolate lover.
Chocolate Oblivion Truffle Torte
-Yields about 16 servings
Ingredients:
  • 1 lb bittersweet chocolate
  • 1 c unsalted butter
  • 6 large eggs

Directions:

  1. Preheat the oven to 425° F
  2. Place a pan of water on top of the stove. Heat until hot, but not boiling.
  3. Put a large heatproof bowl over the pot and mix the chocolate and butter. Stir periodically until melted into a smooth liquid.
  4. Set that aside. Get another large metal bowl, place over the same pan and heat the water to a simmer.
  5. Add the eggs to the second bowl and stir continually to avoid curdling. The mixture should be warm.
  6. Remove from heat and whisk until its volume triples in size, and soft peaks form when the whisk is raised.  Beat for about five minutes for this to occur.
  7. Fold about 12the eggs into the chocolate mixture using a rubber spatula.
  8. When the eggs are fully folded into the chocolate, add the rest of the eggs until no streaks are left and everything is mixed together. Make sure that the heavy mixture at the bottom of the chocolate substance is blended in well.
  9. Pour into the baking pan. Try to transfer all of the mixture. Smooth out the top.
  10. Place the pan into a larger pan that is filled with 1 inch of very hot water. Bake 5 minutes.
  11. Cover the pan loosely with buttered foil. Bake 10 minutes.
  12. Take out of oven and let it cool on a rack for 45 minutes.
  13. Cover with plastic wrap and place it in the refrigerator for about 3 hours or until very firm.
  14. When getting the cake out, if you are using a springform pan, just pop the sides off. If you are using an aluminum baking pan, run a knife along the outside of the cake to loosen up the edges.
  15. Place the pan on a stove burner over low heat so as to warm up the bottom. This will only take a minute or two, so keep an eye on the pan.
  16. When the bottom is loose, put a large plate over the pan and carefully flip both together. If the cake does not release, try putting it back on the stove top and try again.


Whipped Cream

Ingredients:

  • 2 c whipping or heavy cream
  • 1 T confectioners sugar

Directions:

  1. Slowly pour the whipping or heavy cream into an electric mixer. Add the tablespoon of confectioners sugar.
  2. Drape a clean dish cloth over the mixing bowl to prevent splashing. Start the electric mixer slowly, and gradually increase the speed.
  3. Continue until the mixture is stiff and is no longer a liquid.


We had a little trouble with the water bath. First, we couldn’t find a pan that would fit the cake pan and also hold the water. Eventually we found one of the pans we used to cook the chickens in last Thursday. The next problem we ran into was that the recipe called for a springform pan. Unfortunately, as much as Amory tried to make the pan waterproof, the foil would still let water seep through the cracks. So we substituted the springform pan for a regular round aluminum pan. The whipped cream came out wonderful and complimented the torte nicely.


Ravioli: Take One

This week we are focusing on one dish and evolving it throughout the week. The dish we are focusing on is ravioli. The plan for the week is to start by using a simple cheese recipe, and after we have practiced the basics we will use more complicated recipies including pumpkin and bacon. Seeing as we don’t have a lot of practice making ravioli, we know this will be an adventure. We have budgeted for mistakes, but hope to not make any. Our goal for today is to have another smooth cooking day and make another delious meal.

Four Cheese Ravioli

Ingredients

Ravioli Dough:

2 c all-purpose flour

1 pinch salt

1 t olive oil

2 eggs

1 1/2 T water

Ravioli Filling:

1 (8 oz) container ricotta cheese

1 (4 oz) package cream cheese, softened

1/2 c shredded mozzarella cheese

1/2 c provolone cheese, shredded

1 egg

1 1/2 t dried parsley

Directions

  1. Mix the flour and salt together in a bowl and form a well. Beat the olive oil, eggs, and water in a bowl. Pour half the egg mixture into the well. Begin mixing the egg with the flour with one hand; use your other hand to keep the flour mound steady. Add the remaining egg mixture and knead to form a dough.
  2. Knead the dough until smooth, this will take about 8 to 10 minutes, and add more flour if the dough is too sticky. Form the dough into a ball and wrap tightly with plastic., then refrigerate for 1 hour.
  3. While the dough is resting, prepare the ravioli filling. Mix the ricotta cheese, cream cheese, mozzarella cheese, provolone cheese, egg, and parsley and set the filling aside.
  4. Preheat an oven to 375 degrees F (190 degrees C). Beat the egg with the tablespoon of water to make the egg wash.
  5. Roll out the pasta dough into thin sheets and assemble the ravioli. Brush the egg wash over a sheet of pasta and drop the filling mixture on the dough by teaspoonfuls about one inch apart. Cover the filling with the top sheet of pasta, pressing out the air from around each portion of filling. Press firmly around the filling to seal. Cut into individual ravioli with a knife or pizza cutter and seal the edges.
  6. Fill a large pot with lightly salted water and bring to a rolling boil over high heat. Stir in the ravioli, and return to a boil. Cook uncovered until the ravioli float to the top and the filling is hot, this should take about 4 to 8 minutes.
  7. Drain the ravioli

Today we were a bit short on time. This morning we were working on an informational video, and so we only had two hours in the afternoon to make our four cheese ravioli. Since the ravioli has to sit in the fridge for an hour, we decided not to actually finish one ravioli project, but to make the filling and the dough for the pumpkin and four cheese ravioli’s. We ran into a bit of trouble with the dough. First, we managed to spill egg all over the floor when we added to the flour and salt well, because we made the well on a cutting board and it slid out of the well when we tried to mix it. We ended up having to add a lot of water, and some olive oil to make the dough. At least we didn’t have to start over, and the dough is sitting overnight tonight, so that it will be ready to be shaped first thing in the morning. The filling went without error, and is also sitting in the fridge overnight, ready to be glopped in the middle.

Chicken and Dumpling Soup

Basic Chicken Soup
2 T oil
1 onion, diced
4 carrots, diced
4 stalks of celery, diced
2 quarts chicken stalk
2 C diced chicken
1 T poultry seasoning
salt and pepper to taste

1.    Saute the onions in the oil until they are translucent.
2.    Add the remaining vegetables and saute for anther 2-3 minutes. Add the poultry seasoning and about a teaspoon of salt to the vegetables.
3.    Add the chicken stock and bring the soup to a boil. Turn down the heat and simmer for half an hour.
4.    Add the chicken to the soup and stir well. Let the soup continue to simmer for ten minutes.
5.    Add the dumplings from the following recipe and cook accordingly.

Dumplings

(adapted from “Mom’s Simple Dumplings“)

1 1/2 C flour
2 t baking powder
3/4 t salt
3 T shortening
3/4 C milk

1.    Whisk together the dry ingredients and cut in the shortening
2.    Slowly add the milk into the mixture. Be sure not to overmix the dough.
3.    Drop lumps of dough into boiling soup or stew. The dumplings should remain on top of the soup. Cook covered for ten minutes.

Creative Commons License

Chewy Sugar Cookies

Chewy Sugar Cookies
(from the Food Network’s show Sweet Dreams, online recipe)
2 3/4 C flour
1 t baking soda
1/2 t baking powder
1 C softened butter
1 1/2 C white sugar
1 egg
1 t vanilla extract
3-4 T buttermilk
Sprinkles or colored sugar (optional)

Making the Cookies (oven at 375°F)
1. Mix together the flour, baking soda, and baking powder.
2. In another bowl, cream the butter and sugar, then add the egg and vanilla extract.
3. Slowly add the dry ingredient mixture to the butter mixture until the flour is incorporated.
4. Stir in enough buttermilk to soften the dough so it can be rolled into balls, but not so much that the dough becomes wet.
5. Roll the dough into tablespoon-sized balls and place them on a pan.
6. Gently flatten each cookie and lightly brush with buttermilk. If desired, press the toppings onto the cookies before baking.
7. Bake the cookies for 8-10 minutes or until golden brown. Allow to cool on the pan for two minutes before moving to a rack.

Today we set out to complete this simple, fun recipe to make sugar cookies. We lacked buttermilk, so Luke took it upon himself to make homemade buttermilk with 1 tablespoon of lemon juice and a cup of milk. First we mixed the dry ingredients, the flour, the baking powder, and the baking soda. In another bowl, we mixed the butter and sugar, hand creaming it and blending in the egg. By mixing the ingredients in the two bowls we were able to start a dry dough. To soften the dough we added about 5 tsp of the homemade buttermilk. Then the dough was ready to to be molded into small balls. We were able to fit 28 of these small cookies onto the cookie pan, and using a cup we flattened the balls into small disks. All that was left to do was to pop them in the oven and wait for our delicious treats to be ready! In retrospect, 28 cookies was too many for one tray, as the cookies grew into one mass. We tried again with less cookies; both batches were equally tasty, even though the first batch wasn’t perfectly shaped.

The Good Ol’ Chocolate Chip Cookies

The cookies are all done!

Today, Friday, we are making chocolate chip cookies. When we chose our recipes for the week, Friday was cookie day and we decided to go classic. Not only are chocolate chip cookies easy to make, but they always come out so well.

Makes 3 – 4 dozen

Ingredients:

  • ½ lb. butter, softened
  • ¾ c granulated sugar
  • ¾ c brown sugar
  • 2 eggs
  • 2 c all-purpose flour
  • ½ t baking soda
  • ½ t salt
  • 1 t vanilla extract
  • 2 c (8 oz) semi-sweet chocolate chips

Directions:

  1. Preheat the oven to 375°F.
  2. With a mixer, beat together the butter, sugar and brown sugar. Add the eggs one at a time and continue beating until the mixture is nicely blended.

    Unmixed ingredients

  3. Mix the flour, baking soda and salt in a different mixing bowl. After stirring together, gradually add the dry ingredients to the butter and sugar mixture.
  4. After blending the dry ingredients and the butter and sugar mixture, add the vanilla and chocolate chips. Stir to evenly distribute the chocolate chips.
  5. Drop tablespoon-sized balls of dough onto an ungreased cookie sheet. Place the cookies roughly 3 inches apart. Cook for about 10 minutes or until they turn light brown.

    Cookie dough is good for eating.

  6. Cool cookies for a few minutes on the cookie sheet before removing them and placing them on a cooling rack.
  7. Serve warm or store in a container for later.

As expected, the cookies came out just as expected with no difficulties whatsoever except for the fact that we couldn’t get our hands on the electric mixer. Instead, Amory had to mix the sugar and butter by hand with a fork. Hats off to you, Amory! The cookies had to go in for slightly longer than is stated in the recipe, but it may have been because we made the cookies slightly larger than directed.

Snickerdoodles

Snickerdoodles

Ingredients:

1 1/2 c sugar
1/2 c butter or margarine, softened
1/2 c shortening
2 eggs
2 3/4 c all-purpose or unbleached flour
2 t cream of tartar
1 t baking soda
1/4 t salt
1/4 c sugar
1 T ground cinnamon

Instructions:

1. Heat oven to 400ºF.
2. Mix 1 1/2 cups of the sugar, all the butter, shortening and eggs in large bowl. Stir in flour, cream of tartar, baking soda and salt.
3. Shape dough into 1 1/4-inch balls. Mix 1/4 cup sugar and the cinnamon. Roll balls in cinnamon-sugar mixture. Place the balls 2 inches apart on an ungreased cookie sheet.

Bake 8 to 10 minutes or until set. Remove from cookie sheet to wire rack.

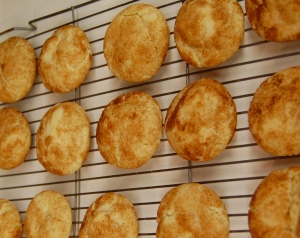
These snickerdoodles were some of the easiest cookies to make, they are very low maintenance and have a remarkably short cooking time. The mixing process went without flaw, the only way we differed from the original recipe was replacing the Cream of Tartar with lemon juice.  This was done at the instruction of our teachers, Ms. Baker and Mrs. McGreevey. The baking process also went without error, with the cookies being done at exactly 10 minutes.  The cookies came out looking delightful and tasting wonderful.