Strawberry Cream Cake

This delicious  cake is certainly the most complicated recipe we will be attempting. It’s a very touchy recipe, with a number of very specific steps that affect the outcome of the cake. We did make a few alterations to this cake. The icing was originally white chocolate, but we decided that it wasn’t cost effective, so a light whipped icing was substituted. Raspberries were originally called for in the filling, but we switched to strawberries because there were some left over from the cheesecake.
Ingredients:
  • 2 ¾ c Butter
  • 2 ½ c + 1T Granulated Sugar
  • ¼ c Water
  • 9 ½ egg whites
  • ½ + ⅛ t Cream of Tartar
  • 3 oz Fresh Orange Juice
  • ¾ c frozen strawberries, defrosted
  • 2 c Vegetable Shortening
  • 8 c Confectioners Sugar
  • 1 ¼ t Salt
  • 4 ½ t Vanilla
  • ¾ c Heavy Whipping Cream
  • 1 c Milk
  • 3 c cake flour
  • 4 t Baking powder

Cake:
1. Preheat the oven to 350°F.
2. Combine 4½ egg whites, ¼c milk, and 2¼t vanilla.
3. In a mixing bowl, combine cake flour, 1½c  Sugar, baking powder, and ¾t salt.
4. Add to the dry ingredients ¾c butter and ¾c milk. Slowly mix until moist.
5. Beat at medium speed for 1½ minutes to aerate batter.
6. Add ⅓ of the egg batter. Beat for 20 seconds. Repeat with remaining batter.
7. Pour into two greased and flowered pans.
8. Bake for 25-30 minutes. Then, cool on metal racks for ~10 minutes.

Filling:
1. Beat butter until smooth and creamy with a wooden spoon.
2. Puree frozen strawberries with 1 T sugar. Drain off liquid; make sure to retain a few tablespoons to use as coloring.
3. Pour strawberry puree into the butter and mix well.
4. In a small saucepan heat ¾ c sugar and ¼ c water until sugar dissolves and the mix bubbles. Remove from heat.
5. Beat 5 egg whites and cream of tartar until there are soft peaks.
6. Beat into the eggs ¼ c Sugar until stiff peaks.
7. Bring the syrup in the saucepan up to 248°. Transfer syrup to glass container to stop cooking.
8. Beat the syrup into the whites. Continue beating until cool.
9. Beat in 2 c butter at a medium speed.
10. At a slow speed, add orange juice
11. Refrigerate until used. Quickly beat directly before constructing cakeIcing:
1. Cream shortening until fluffy. Pour in confectioners sugar and blend well.
2. Add  2 t vanilla, ½ t salt, and whipping cream. Blend until moist.
3. Beat at high speed until fluffy.
4. Slowly beat in retained strawberry juice until icing is a pleasant shade of pink

Construction:
1. split the layers of the cake in half horizontally
2. spread one layer with a portion of the filling. Then, cement another layer on top.
3. repeat for all layers
4. chill the cake for 10 minutes
5. spread frosting over cake

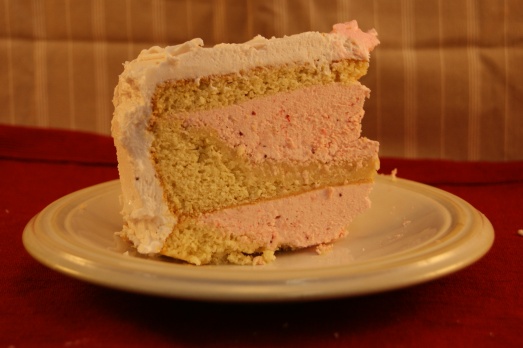
There were a number of complications associated with this cake,  but it came out well. For some reason one of the cakes fell in the middle and the other did not. The only explanation we could find was that the batter was unevenly mixed, causing one of the pans to have less fat in it. Either way, we couldn’t properly divide the sunken one, so we only divided one of the layers in half. We placed the half layers on the top and bottom, with the messed up layer in the middle.
Icing the cake was relatively simple, and it came out well. The only recommendation would be to add about 1/4c of strawberry juice, rather than 1-2 T, as the color did not show up well. We would also add more strawberry puree to the filling, because the butter overwhelms the taste somewhat.

Chocolate Oblivion Truffle Torte

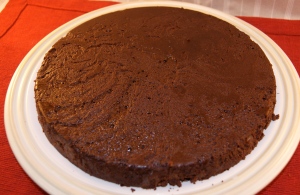
Chocolate Oblivion Truffle Torte in name alone sounds absurdly decadent. This light and fluffy torte is not too complicated, but requires lengthy preparations and will need to be executed carefully. Only calling for three ingredients, the recipe will serve a good number of people and would be great for any special occasion. This torte is also a good substitute for a normal cake and is perfect for the chocolate lover.
Chocolate Oblivion Truffle Torte
-Yields about 16 servings
Ingredients:
  • 1 lb bittersweet chocolate
  • 1 c unsalted butter
  • 6 large eggs

Directions:

  1. Preheat the oven to 425° F
  2. Place a pan of water on top of the stove. Heat until hot, but not boiling.
  3. Put a large heatproof bowl over the pot and mix the chocolate and butter. Stir periodically until melted into a smooth liquid.
  4. Set that aside. Get another large metal bowl, place over the same pan and heat the water to a simmer.
  5. Add the eggs to the second bowl and stir continually to avoid curdling. The mixture should be warm.
  6. Remove from heat and whisk until its volume triples in size, and soft peaks form when the whisk is raised.  Beat for about five minutes for this to occur.
  7. Fold about 12the eggs into the chocolate mixture using a rubber spatula.
  8. When the eggs are fully folded into the chocolate, add the rest of the eggs until no streaks are left and everything is mixed together. Make sure that the heavy mixture at the bottom of the chocolate substance is blended in well.
  9. Pour into the baking pan. Try to transfer all of the mixture. Smooth out the top.
  10. Place the pan into a larger pan that is filled with 1 inch of very hot water. Bake 5 minutes.
  11. Cover the pan loosely with buttered foil. Bake 10 minutes.
  12. Take out of oven and let it cool on a rack for 45 minutes.
  13. Cover with plastic wrap and place it in the refrigerator for about 3 hours or until very firm.
  14. When getting the cake out, if you are using a springform pan, just pop the sides off. If you are using an aluminum baking pan, run a knife along the outside of the cake to loosen up the edges.
  15. Place the pan on a stove burner over low heat so as to warm up the bottom. This will only take a minute or two, so keep an eye on the pan.
  16. When the bottom is loose, put a large plate over the pan and carefully flip both together. If the cake does not release, try putting it back on the stove top and try again.


Whipped Cream

Ingredients:

  • 2 c whipping or heavy cream
  • 1 T confectioners sugar

Directions:

  1. Slowly pour the whipping or heavy cream into an electric mixer. Add the tablespoon of confectioners sugar.
  2. Drape a clean dish cloth over the mixing bowl to prevent splashing. Start the electric mixer slowly, and gradually increase the speed.
  3. Continue until the mixture is stiff and is no longer a liquid.


We had a little trouble with the water bath. First, we couldn’t find a pan that would fit the cake pan and also hold the water. Eventually we found one of the pans we used to cook the chickens in last Thursday. The next problem we ran into was that the recipe called for a springform pan. Unfortunately, as much as Amory tried to make the pan waterproof, the foil would still let water seep through the cracks. So we substituted the springform pan for a regular round aluminum pan. The whipped cream came out wonderful and complimented the torte nicely.


Red Velvet Cake

Red Velvet Cake

Cake

2.5 c flour
1.5 c sugar
2  T unsweetened baking cocoa
1 T baking powder
1 t salt
1.5 c vegetable oil
1 c buttermilk
1 t vanilla
1  oz red food coloring
2 eggs

  1. Heat Oven to 350˚F. Grease bottoms and sides of 3 (8 or 9-inch) round pans with shortening; lightly flour.
  2. In a large bowl, beat all cake ingredients with electric mixer on low-speed 30 seconds,  scraping bowl constantly. Beat two minutes on medium speed, scraping bowl occasionally.
  3. Pour into pans.
  4. Bake 25-35 minutes or until toothpick inserted in center comes out clean.
  5. Cool ten minutes; remove from pans to cooling rack. Cool completely, about 1 hour.

Frosting

0.5 c flour
1.5 c milk
1.5 c sugar
1.5 c butter, softened
1 T vanilla

  1. In medium saucepan, mix 0.5 cups flour and 1.5 cups milk with whisk until smooth.
  2. Cook over medium heat until mixture is very thick, stirring constantly.
  3. Remove from heat; cool 10 minutes.
  4.  In a large bowl, beat 1.5 cups sugar and butter with electric mixer on medium speed until light and fluffy.
  5.  Gradually add flour mixture by tablespoons; beat on high-speed until smooth.

Cake Assembly

  1. Fill and frost cake, using 1 cup frosting between layers.
  2. Store covered in fridge.

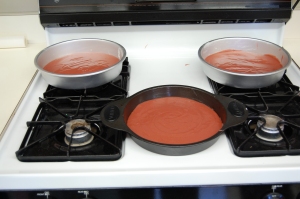
While the cake is cooking, we are reflecting on how the first step of our cake making process went. First we should mention that we did, in fact, not make Red Velvet Cake, instead we made Pink Velvet Cake. While there is a common misconception about a reaction with the cocoa powder that turns the cake red, it only gets its coloring from the red food dye. Without knowing this before experimenting, we did not add enough dye to turn the cake a deep red color. We also learned a new, very effective way to grease the pan. By adding parchment paper to the bottom of a greased pan, and then greasing the top of the paper, it keeps the cake together and stops it from sticking to the pan. When we got to cooking the cake, we found out two things. Our oven was accidentally set to 400˚ F, and thankfully, after checking 14 minutes into the cook time, discovered that our cakes were cooked. The red velvet cake doesn’t rise as much as expected.

While waiting for the cake to cool, we learned yet another trick to baking. By putting the cakes into the fridge, we can reduce the cooling time and speed up the entire process.

After allowing the butter to soften, we made the frosting. We found, through tasting the frosting, that you have to mix the milk and flour together before putting it in the sauce pan because the flour becomes clumpy, and the frosting looks and tastes wrong. To remedy this problem we tried something rather low-tech. We took the frosting and pressed it through the strainer with the back of a rubber spatula. This effectively removed all the flour clumps and left a smooth, creamy, sugary delight. Other than that, the frosting went smoothly and without error.